Turmeric, the golden spice renowned for its myriad of health benefits and culinary uses, can also be a splendid addition to your home garden. Not only does it produce vibrant and lively flowers, but cultivating turmeric at home offers the unique advantage of having a steady supply of this precious spice year-round.

In this article, we will take you through the steps to successfully grow turmeric in your own backyard or indoor garden, ensuring a flourishing and abundant harvest.
Choosing the Right Pot and Soil
The foundation of successful turmeric cultivation begins with selecting the ideal pot and soil. Turmeric plants thrive in pots that are at least 40 cm deep and wide enough to accommodate the extensive root development.

The soil should be well-drained and enriched with organic matter. A recommended substrate mixture consists of peat, sand, and high-quality garden soil.
Ensuring these conditions provides a solid base for your turmeric plant to flourish.
Propagation Methods
Turmeric propagates through the division of rhizomes, which are the underground portions of the plant responsible for root and shoot growth. You can obtain rhizomes from nurseries or by collecting them from mature turmeric plants.
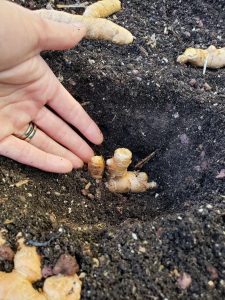
To propagate turmeric, divide the rhizomes into 10 cm segments, each containing at least two buds. Plant these rhizome sections in the soil, burying them approximately 5 cm deep.
Optimal Positioning
Turmeric thrives in sunny and warm conditions. Select a location that receives plenty of bright sunlight, with temperatures consistently above 18°C.
This will create an environment that encourages healthy growth and robust turmeric plants.
Proper Irrigation
Maintaining the right balance of moisture is crucial for turmeric. While it requires regular watering, be cautious not to overwater.
Allow the soil to dry out between waterings, as excessive moisture can lead to root rot and other issues.

Fertilization Schedule
During the growth period, which spans several months, it’s essential to fertilize your turmeric plant every 15 days. Use a liquid fertilizer specifically designed for flowering plants to provide the necessary nutrients for optimal growth.
Harvesting Turmeric
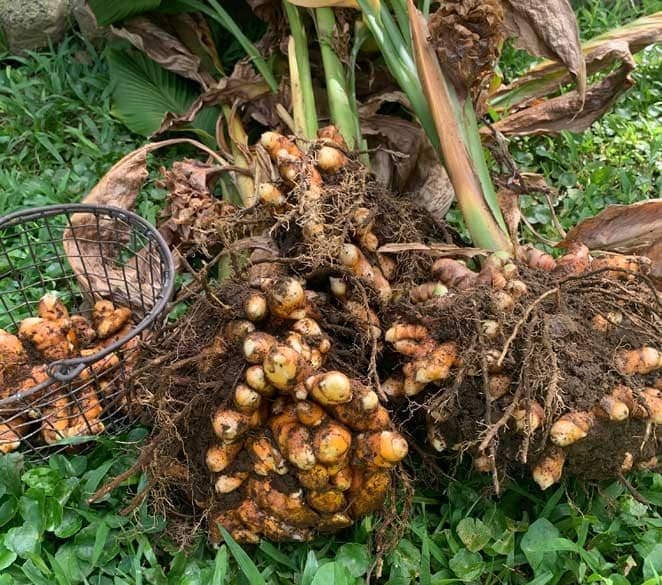
The moment of reward arrives approximately nine months after sowing your turmeric rhizomes. Harvest them when they are well-developed and have acquired a golden hue.
To harvest, gently remove the rhizomes from the soil and place them in a dry, well-ventilated area to dry. Once thoroughly dried, you can store them in a cool, dry place for extended periods.
Tips for Abundant Flowering
If you’re keen on maximizing the ornamental aspect of your turmeric plant, follow these tips to encourage abundant flowering:

- Ensure your plant receives bright sunlight and maintains temperatures above 18°C.
- Maintain a regular but not excessive watering routine, allowing the soil to dry between watering sessions.
- Fertilize your turmeric plant with a liquid flowering plant fertilizer every 15 days.
- Prune away withered flowers promptly to stimulate further flowering.
- By adhering to these guidelines, your turmeric plant will not only provide a steady supply of this precious spice but also grace your home with vibrant colors and captivating beauty.
- Additional Tips for Home Turmeric Cultivation
Here are some extra tips for cultivating turmeric at home:
- If you live in an area with cold winters, consider protecting your plant during its vegetative rest period by moving it to a sheltered location or covering it with cloth or non-woven fabric.
- To use turmeric as a spice, you can harvest the rhizomes while they are still young and tender. Keep in mind that more mature rhizomes offer a richer aroma but can be tougher to grate.
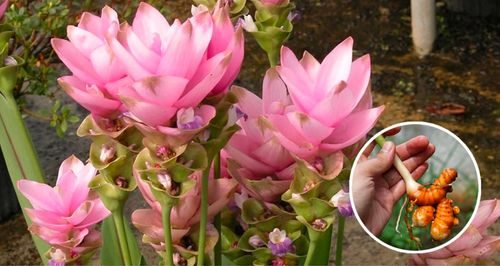
- Turmeric flowers are not only ornamental but also edible and flavorful. Experiment with incorporating them into your culinary creations for a delicate aromatic touch.

